The working method: import multiple photos, paint over the watermark on the first image, then let CleanFrame apply the selection to each image in turn. The selection follows the same relative position in every frame. Group matching layouts together before starting.
First, check whether the photos belong in one batch
A batch works best when the watermark appears in the same corner, with the same size relative to the photo. A set of landscape images exported with one logo placement is a good candidate. A mixture of portrait shots, cropped images, and different logo sizes needs separate groups.
Look at the first, middle, and last photo before importing the whole set. Compare the watermark's distance from the right and bottom edges. Also check its shadow or outline: those pixels need to fit inside the brush selection.
| What you see | How to group the photos |
|---|---|
| Same orientation and proportional watermark placement | Start with one batch and review every result. |
| Portrait and landscape images mixed together | Make separate batches for each layout. |
| Same watermark size in pixels, but very different image sizes | Group by dimensions; one relative selection may not cover them all. |
| Different crops, corners, or watermark positions | Split into matching groups, or clean those images individually. |
Use your own images or images you have permission to edit. If an unmarked original is available, use that instead of reconstructing a covered area.
Remove the watermark with one brush selection
- Open Batch cleanup. In CleanFrame's sidebar, choose Batch cleanup, then Import images. Use Browse files to select several photos. Importing several images from New cleanup on the Projects page also opens the batch workflow.
- Check the first image. It is the reference for the brush selection. Make sure its watermark placement represents the rest of the group. If it is an exception, begin again with a matching set.
- Paint over all of the watermark. Adjust Brush size, cover the lettering, outline, and shadow, and leave only a small margin around them. Use the eraser to correct any selection that touches an important subject.
- Start with Natural fill quality. This gives you a useful starting point. A different quality setting can change the fill, but cannot guarantee recovery of hidden detail.
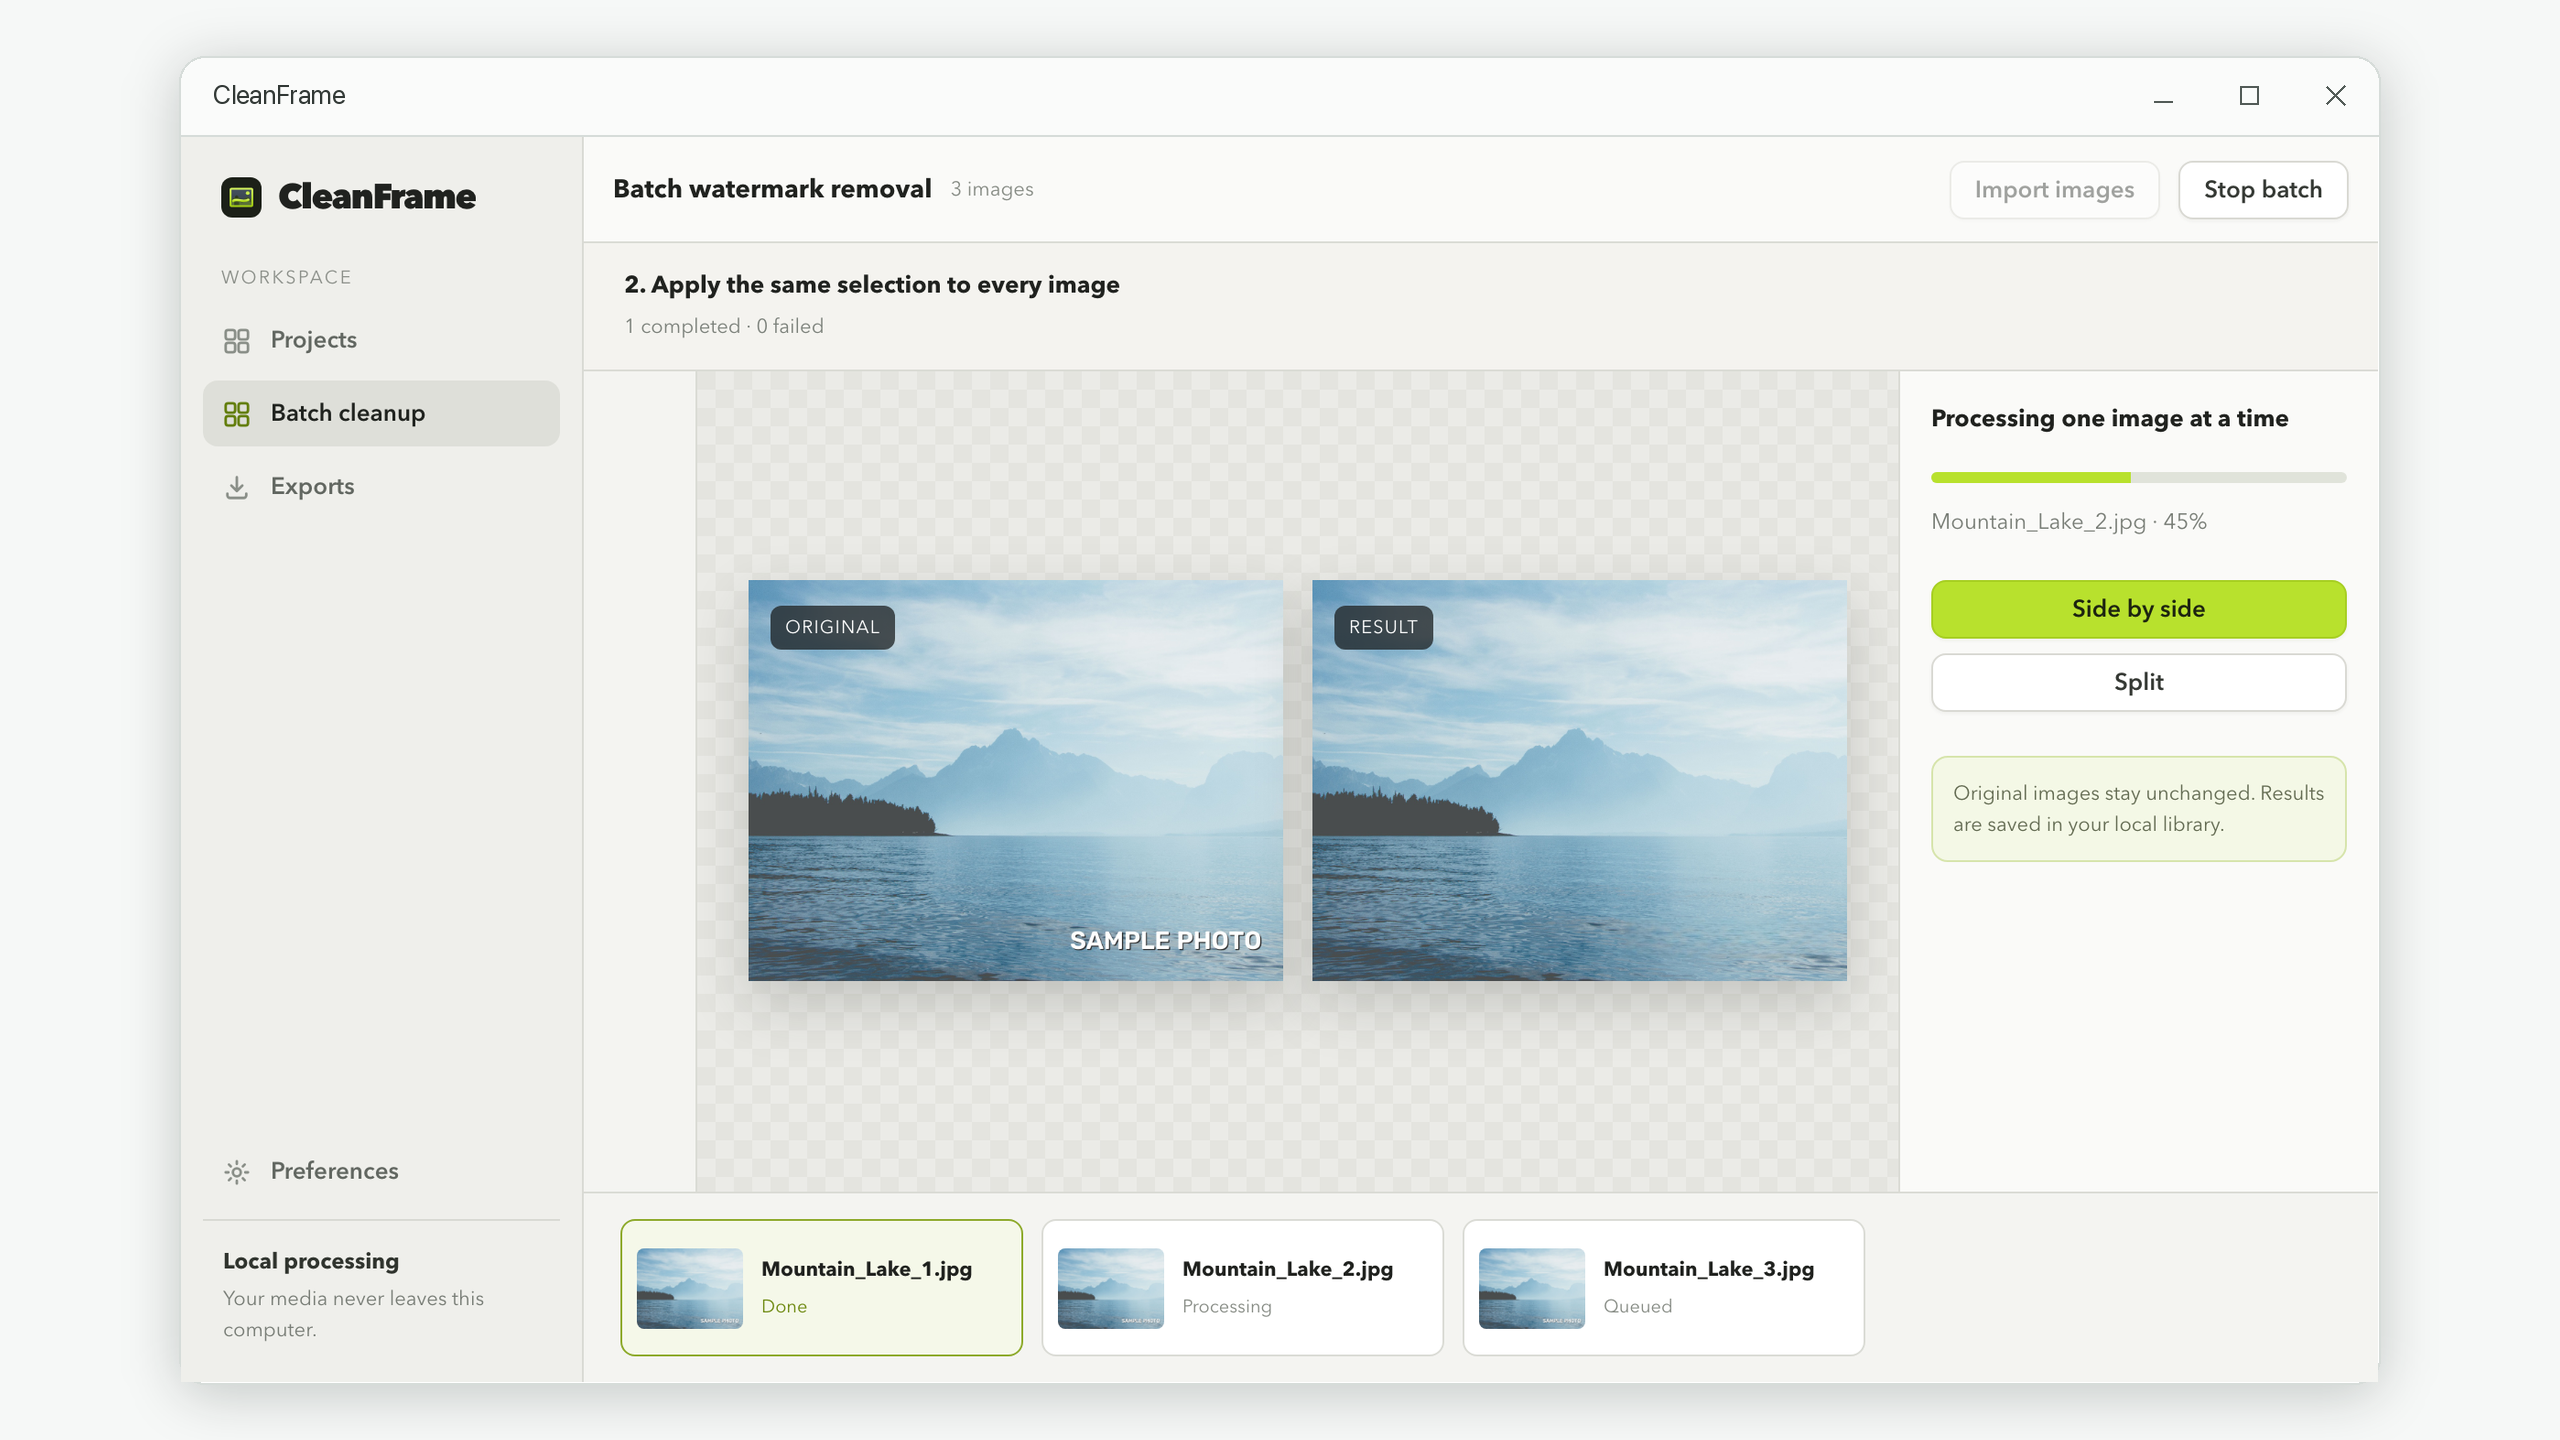
- Choose Clean [count] images. The app processes one image at a time. The queue shows which image is done, which is processing, and which is still waiting.
- Review before exporting. Select completed images in the queue. Use Side by side or Split to compare the cleared area with the original, then choose Export all results and select a format and folder.
.jpg)
What happens when image sizes differ?
CleanFrame scales the first selection to each image's dimensions. A mark near the lower-right corner stays near the lower-right corner of the next image. This works well for photos that use a consistent layout at different resolutions.
It is not automatic watermark detection. The app does not search for the logo or move the selection to follow it. A watermark that stays 40 pixels from an edge across unrelated image sizes does not necessarily stay at the same relative position. Separate those sizes if the selection would miss some lettering.
Review failures and stop a batch safely
The same selection can cover a watermark correctly yet produce different results on water, grass, brick, and a person's face. Review the actual backgrounds, rather than assuming the first good result proves the entire group is ready.
If a photo fails, the remaining images can continue processing. Read its status and clean that image separately after checking the file. If the selection is wrong for several images, choose Stop batch. The current processing step finishes before stopping; its unfinished output is discarded and later images are skipped.
Keep the app open until the batch completes. Closing and restarting the application interrupts the queue. Completed results remain in the local library, but the unfinished queue does not resume automatically after an app restart.
Before you export the whole group
- Every watermark, including any outline, fits inside the selection.
- No important face, product detail, or readable text has been covered accidentally.
- The repaired area looks acceptable on each photo, especially on patterned backgrounds.
- The finished count matches the results you intend to save; failed or skipped images have been checked separately.
- The export format and destination folder are correct.
For one awkward image, use the blurry watermark removal troubleshooting guide. A smaller, more accurate individual selection is often more useful than rerunning the entire batch.
Keep the cleanup on your computer
Brush, compare, and save a separate result with CleanFrame for Windows.
View CleanFrame in the Microsoft Store